


Introduction - Snowsql CLI Client
SnowSQL is a command-line client for Snowflake, a cloud-based data warehousing and analytics platform. It allows you to execute SQL queries and perform all DDL and DML operations. It can be downloaded from the Snowflake Repository and has all the same capabilities as the Snowflake UI. It provides an easy way to access Snowflake right from your command line.
In this article we'll discuss how to install and configure SnowSQL.
Steps to Activate SnowSQL CLI Client:
Step 1 – Download and Install SnowSQL CLI
1. Login into Snowflake and click on Help in the top right corner
2. Click on Downloads -> Snowflake Repository
3. Select Cli Client (snowsql) and click Snowflake Repository in the Downloads Dialog box.

This will lead you to a web index page.
4. Select the operating system where you want to install SnowSQL and click download.
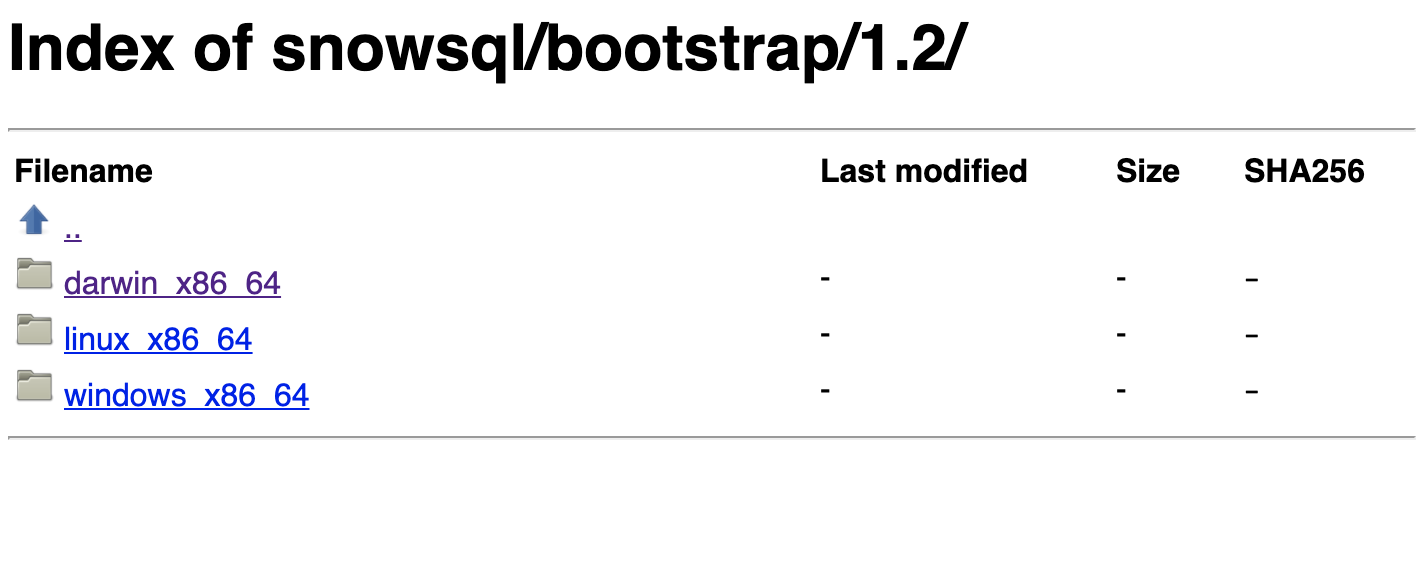
5. Click on bootstrap -> 1.2 (or the newest version) -> Pick your OS (Darwin is Mac) -> Download the latest version
6. Run the installer.
Step 2 – Running SnowSQL CLI
2.1. Check SnowSQL is installed properly
Run: snowsql -v
Output: Version: 1.2.5 (or latest)
Good! Now that snowsql has been installed, let’s set up our environment to work.
2.3 Login to your account
snowsql -a account_name -u username
Account name can be found in the first part of your URL when logged into Snowflake (everything before snowflakecoputing.com, for instance, sample_username.sample_region.azure)

Setup the database context
// create a warehouse
CREATE WAREHOUSE yourname_WH AUTO_SUSPEND = 60 AUTO_RESUME=TRUE;
USE WAREHOUSE yourname_WH;
// select your desired database
USE DATABASE SNOWFLAKE_SAMPLE_DATA;
// select the data schema
USE SCHEMA TPCDS_SF100TCL;
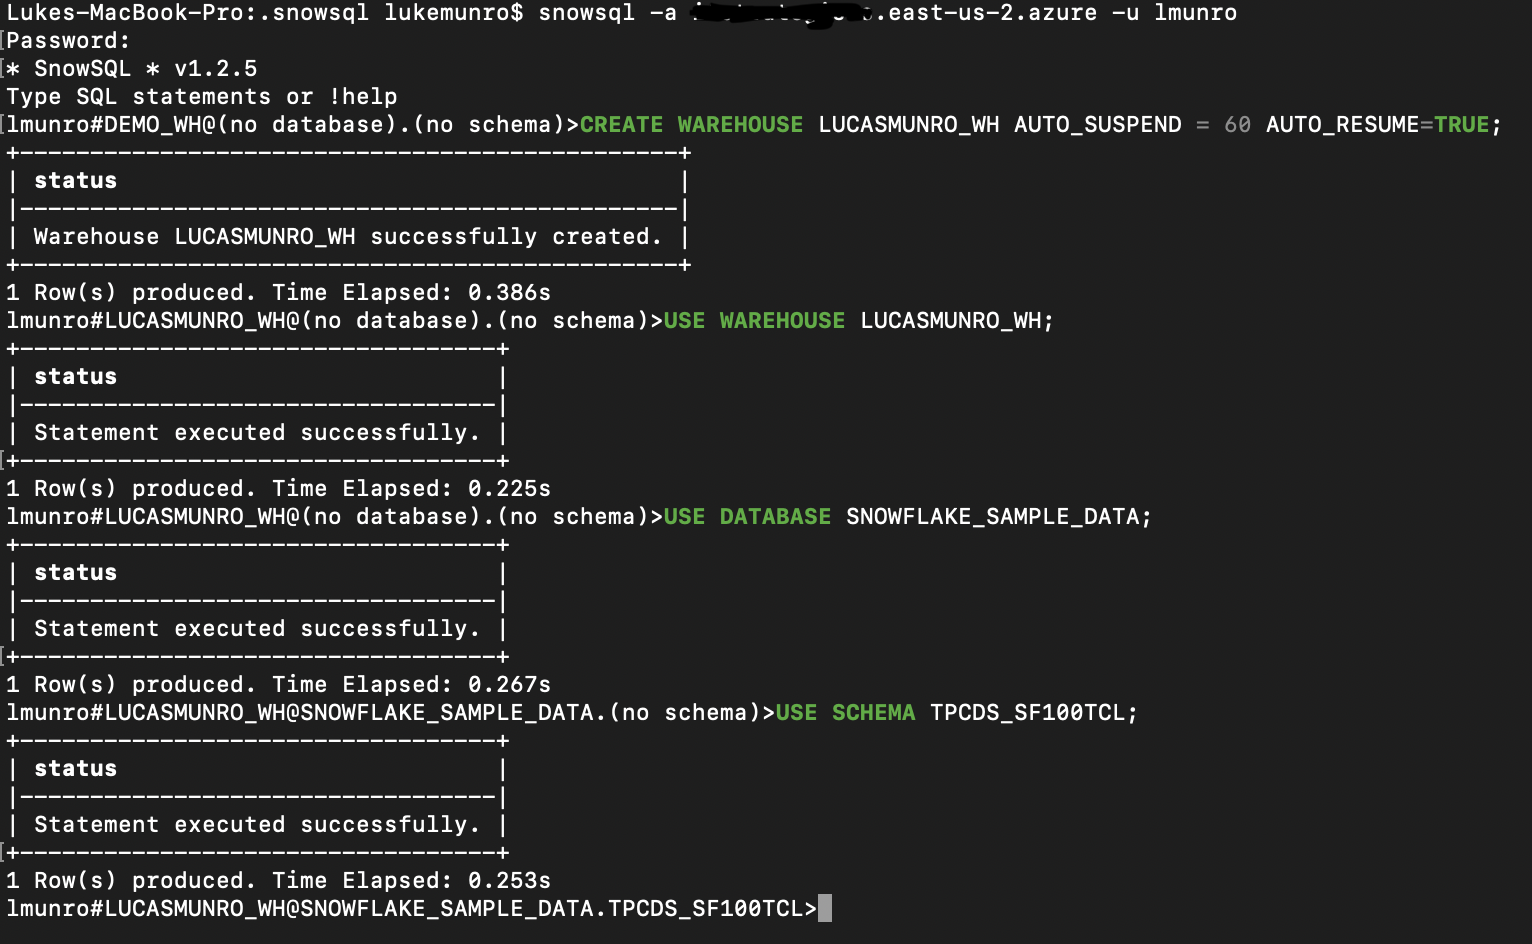
(Note: Lukes-MacBook-Pro and lmunro are specific to my console. Yours will be different unless you somehow stole my laptop in which case please give it back.)
Awesome! Now we’re ready to perform whatever data analytics you desire.
However, it can be quite tedious to type in your account, username, password, warehouse, DB, and schema every time you log in. You can edit the snowSQL config file to perform these automatically.
Step 3 – Edit Config File
3.1 Locate the hidden snowsql folder
-
- Linux/Mac OS: ~/.snowsql/
- Windows: your-user-folder.snowsql
3.2 Open the file named config and add the following
[connections.configuration-name]
accountname = your_account_name
username = your_username
password = your_password
dbname = SNOWFLAKE_SAMPLE_DATA
warehousename = yourname_WH
schemaname = TPCDS_SF100TCL
- Save and exit
- Connect using the following command
snowsql -c configuration-name

Step 4 – Modify Display Prompt
SnowSQl prompt automatically displays the current user, warehouse, database, and schema. The tokens can be seen in the image above. This prompt can be a bit lengthy but you can edit the prompt with the following command:
!set prompt_format=>>
To auto-change the prompt format, add the following to the configuration file.
[options]
auto_completion gives you possible existing options, very helpful!
auto_completion = True
prompt_format=>>
Q&A’s Section:
1. What does the -c mean?
Whenever you run a program in the terminal you can specify arguments with a dash (-). The -c parameter tells the program snowsql to look in ~/.snowsql/config for a connection named lmunro_config. It then uses those credentials and other configurations to quickly log you in and set up your environment. Note: -c is an abbreviation. You can also use –connection.
2. Are there any other parameters that I should know about?
Yes! There are a bunch of parameters that can make your life easier. You can log in and set up your environment all in one line, like this:
snowsql -a **.east-us-2.azure -u lmunro -d SNOWFLAKE_SAMPLE_DATA -s TPCDS_SF100TCL -w LUCASMUNRO_WH
Don’t worry if that’s a bit overwhelming. You can (and should) use the config file so you don’t need to type it all out. If you’re interested in using these parameters or want more information check out the docs.
3. What is the config file?
The config file is a file that can be edited to set configuration and options for the SnowSQL CLI. It allows you to preset login credentials and database settings by adding a [connections] block and specify options by adding to the [options] block. For more information, you can check out the public documentation at https://docs.snowflake.com/en/user-guide/snowsql-config.html.
Conclusion
SnowSQL CLI is a quick way to plug into Snowflake directly from the terminal. It’s preferable to the UI if you already have a grasp of terminal operations and don’t require the UI to navigate around.
The config file in the SnowSQL folder is where you can set configuration and options for the CLI. You can preset login credentials and database settings by adding a [connections] block and specify options by adding to the [options] block. For more information check out the public documentation.
