


What’s the benefit of learning to create a database on Snowflake?
It is important to learn to create databases with Snowflake because:
- Snowflake is a popular data warehouse built for the cloud. Having experience with Snowflake will be valuable for data engineers and data scientists.
- Snowflake has many advantages over traditional data warehouses like fast performance, scalability, and low cost. Being able to build databases on Snowflake will allow you to leverage these benefits.
- Snowflake uses SQL, a common query language, so the skills you learn will be transferable to other systems.
- Snowflake has many features for modeling and managing data that you can utilize by knowing how to create databases and schemas.
- There are many resources and a large community to help you learn Snowflake.
Creating Databases with the User Interface:
To complete this tutorial, you will need a Snowflake account and the URL to log in to the web interface.
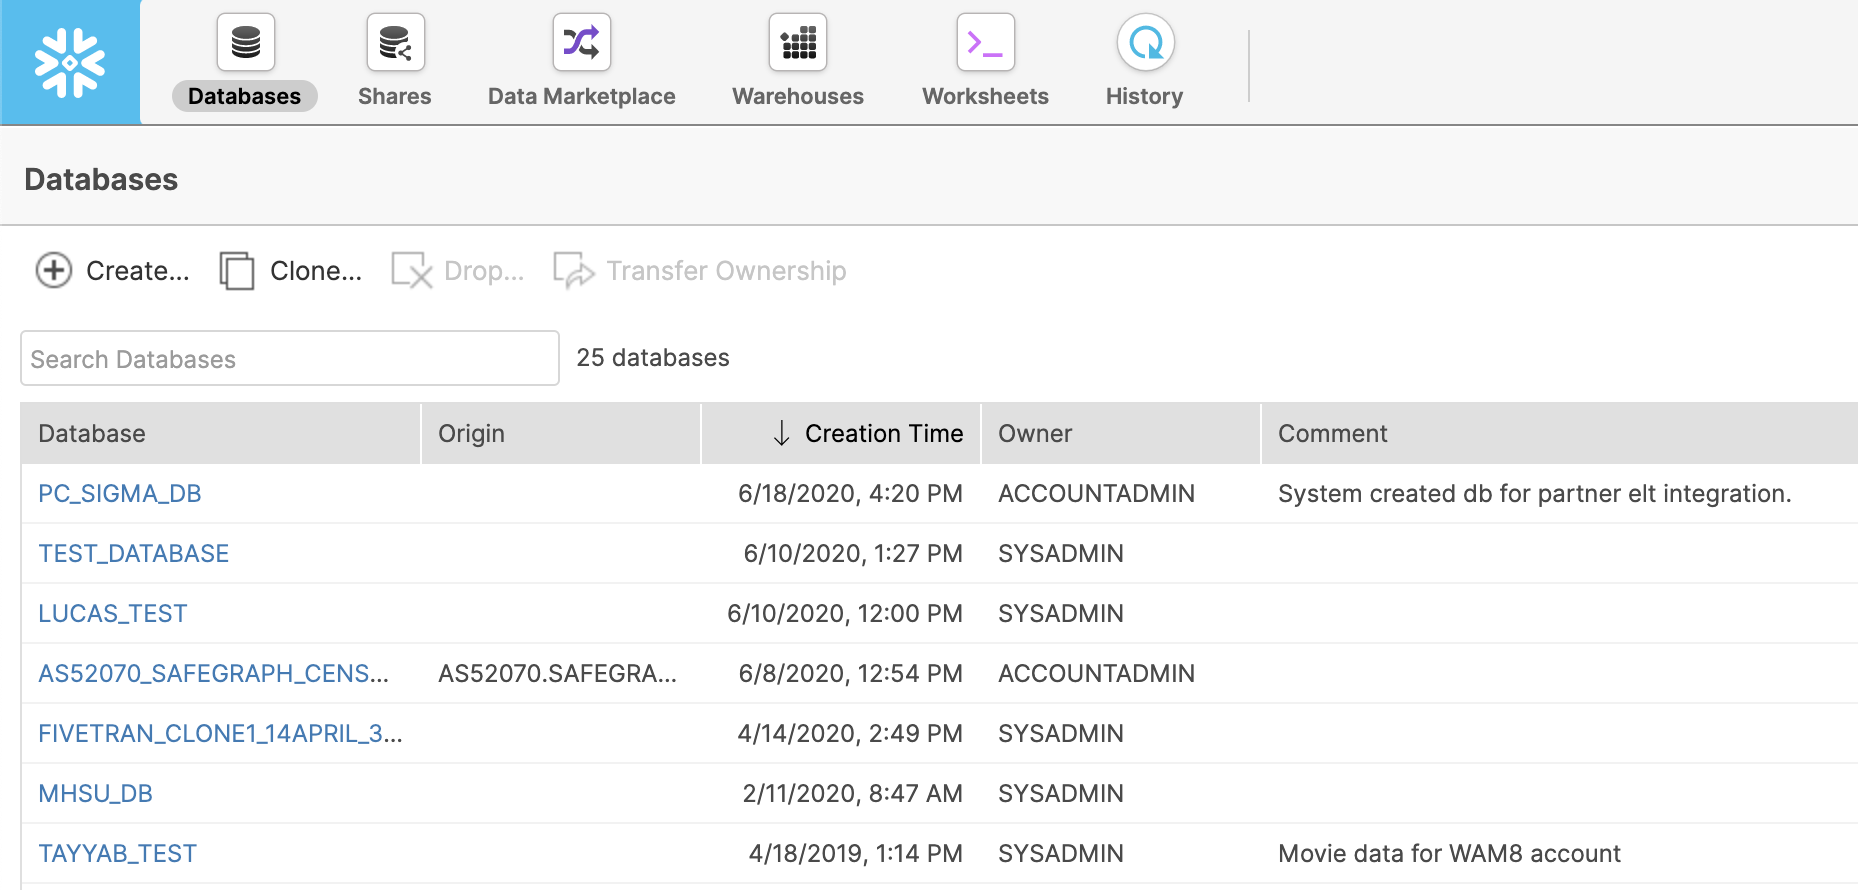
Log in to your Snowflake environment and select the Databases tab at the top left of the screen. It should look similar to the image below, except you won't have the same databases. Snowflake provides sample data.
Let’s create a new database. Click the Create button and fill out the information in the pop-up window.
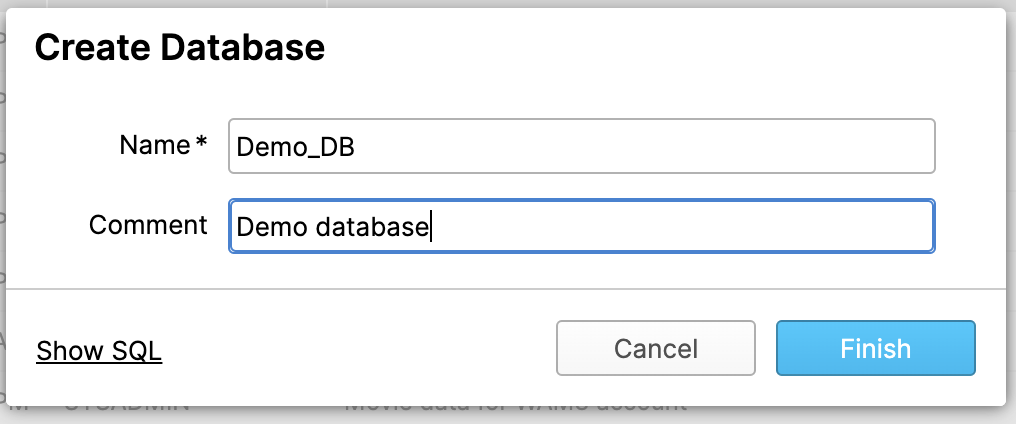
When naming the database, there are restrictions -- no spaces and the name cannot start with a number. You can read the full set of restrictions in Snowflake’s documentation.
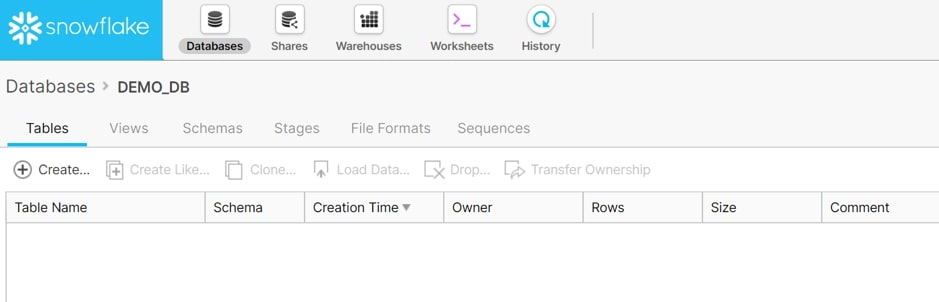
Select Finish and you’ll see your new database appear in the table. Click on your database and you’ll see any tables, views, or schemas that exist. Since the database has just been created, none of these objects exists yet.
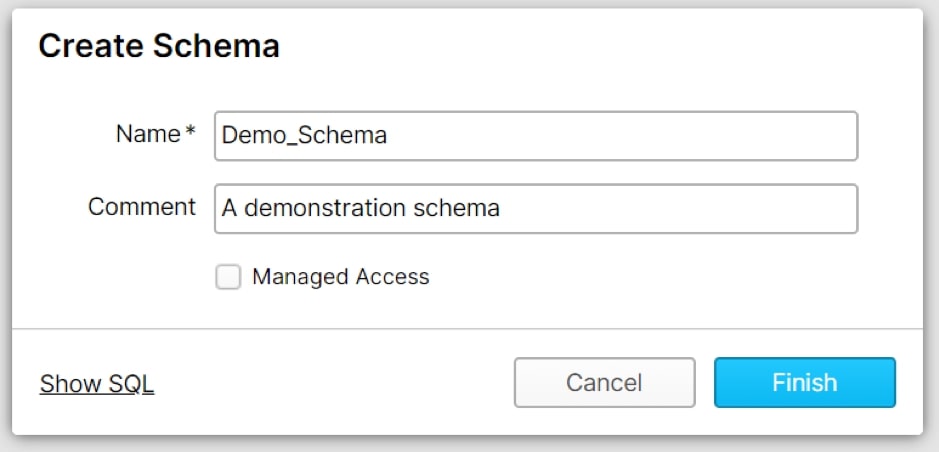
Creating Schemas:
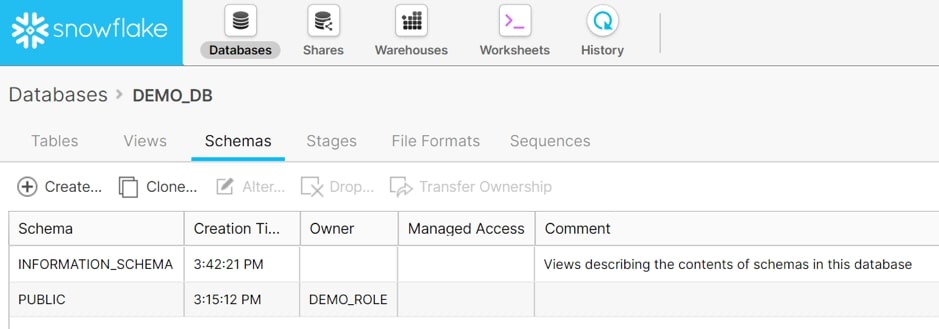
A snowflake schema is a logical grouping of database objects (tables, views, etc.). Each schema belongs to a single database and can have its security configuration.
From inside our selected database, select the Schemas tab. Snowflake will create a public and information schema by default. The PUBLIC schema can be used to create any other objects. The INFORMATION_SCHEMA contains all the metadata for the database.
Click the Create button and provide and name and comment. The Managed Access option determines if the security of the objects within the schema is managed by the schema owner or the owner of the object.
Creating Databases and Schemas with Code:
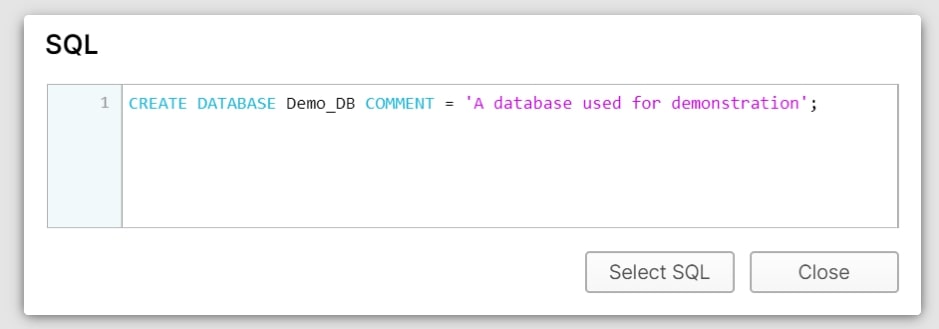
All operations done with the UI can also be done with SQL code on the tab of the worksheet. To see what code corresponds to the operations we are doing, click on the Show SQL button.
Using code streamlines our Snowflake work once we understand how it functions. This can reduce time and automate tasks.
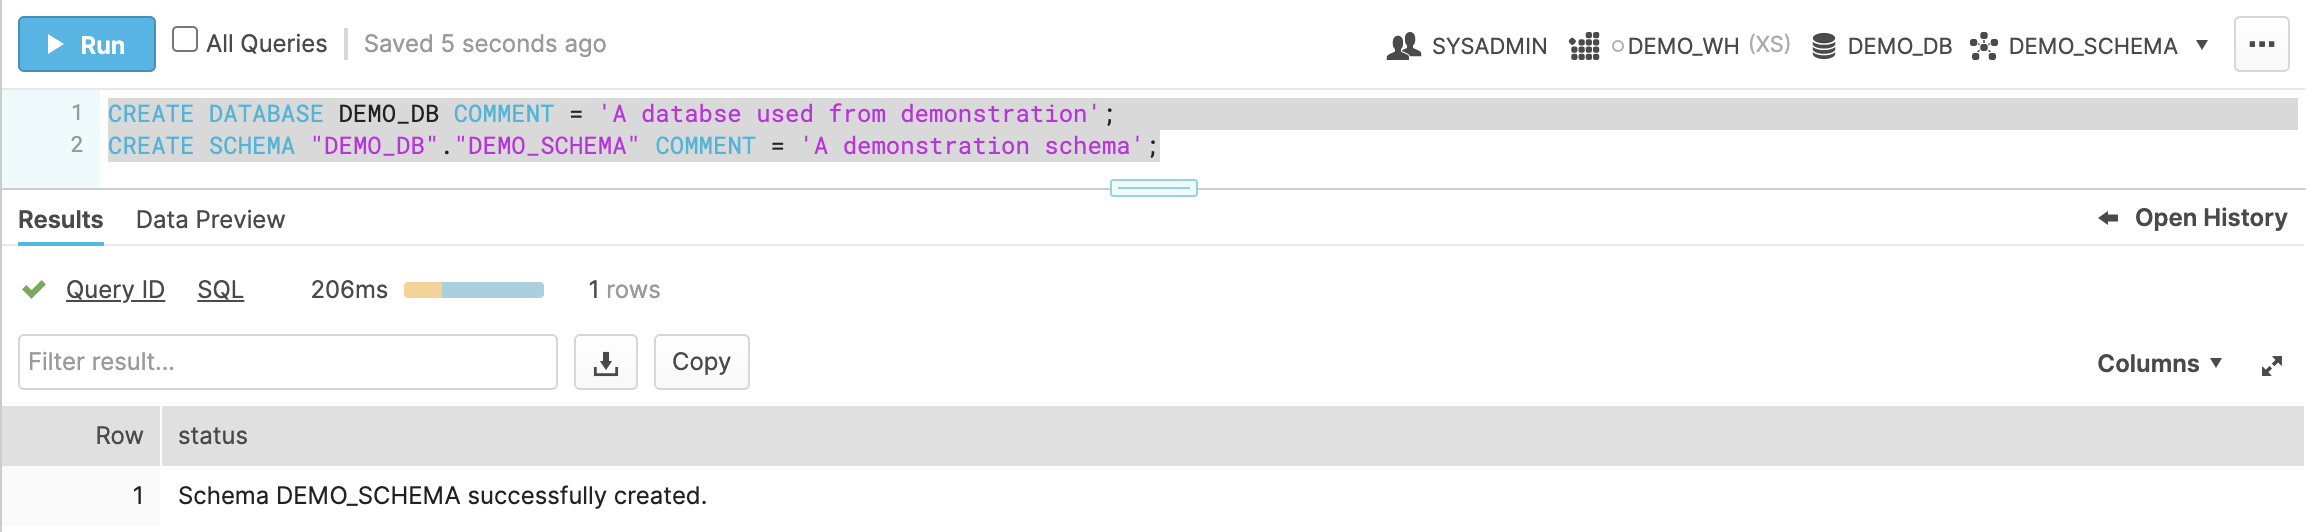
To run any SQL code in Snowflake, choose Worksheets from the main menu. This lists all databases on the left for reference and provides a space to enter your code. On the right, we see our current role, database, warehouse, and schema.
Let’s enter the code to replicate the UI process from before. When you click Run, only the line where your cursor is executes. To run multiple lines, highlight them and click Run. If you’ve already created your database, run DROP DATABASE DEMO_DB for this to work.
And with those steps, you should be able to create a database. If you want to learn new techniques, keep checking our blog regularly for more helpful tips.
Conclusion:
To conclude, we have walked through the steps to create your first database and schema in Snowflake using both the user interface and SQL code. You now have the foundation to build tables, load data, and query your Snowflake data warehouse.
